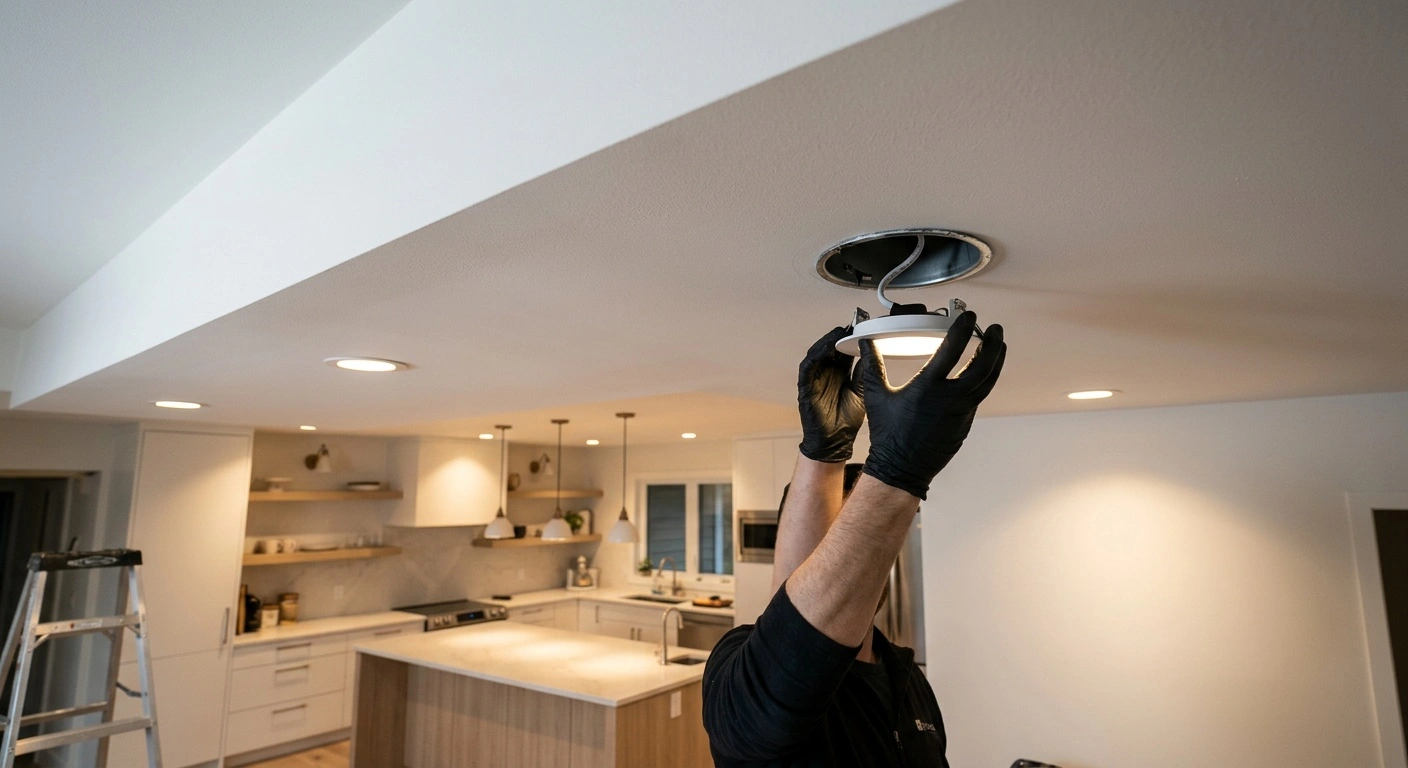
Changing recessed lighting to LED is often a beginner-level project with a standard E26 socket and a compatible retrofit. First, decide between an LED bulb and a complete retrofit downlight. Then confirm that the existing housing supports your chosen replacement.
A bulb swap takes less time. However, a retrofit downlight provides a new trim, a cleaner ceiling line, and more consistent beam distribution. Compare brightness in lumens instead of watts. About 800 lumens replaces the useful output of a typical 60-watt incandescent bulb.
Many 5- or 6-inch recessed fixtures use LED modules that produce 700 to 1,200 lumens. This guide covers screw-in bulbs and plug-in retrofit modules for existing recessed cans. Hire a licensed electrician if the project requires junction-box access, permanent wiring changes, a new circuit, or hardwired housing removal.
Choose the Right LED Conversion
Turn off the light and identify the fixture before buying a replacement. A conventional recessed can has a metal housing, removable trim, and usually an E26 screw socket. Older integrated LED downlights may use proprietary connectors. Canless wafer lights use thin panels connected to separate junction boxes above the ceiling.
Measure the housing’s inside diameter, not the trim’s outside edge. Fixtures sold as 5-inch or 6-inch models do not always share the same dimensions. Some retrofit modules fit both sizes through adjustable spring positions.
Check how the original trim attaches to the housing. Common mounting systems include torsion springs, coil springs, and friction clips. The replacement must attach securely to the existing brackets.
Choose a UL- or ETL-listed product with the correct dry-, damp-, or wet-location rating. For a sealed or enclosed fixture, choose a bulb specifically rated for enclosed use. Trapped heat can make an unsuitable LED dim, cycle on and off, or fail early.
| Conversion method | Best use | Typical light output | Main compatibility check | Tradeoff |
|---|---|---|---|---|
| LED reflector bulb | Fast replacement that retains the existing trim | About 650 to 1,200 lumens | Base type, bulb diameter, and enclosed-fixture rating | The old trim remains visible and may leak air |
| LED retrofit downlight with E26 adapter | Updating the lamp and trim together | About 700 to 1,200 lumens | Housing diameter and spring type | The module may not fit shallow or unusually shaped cans |
| Replacement module for an integrated LED can | Replacing a failed original module | Varies by fixture | Connector and housing compatibility | Connectors are not universally interchangeable |
| Canless wafer downlight | New construction or replacement of an obsolete housing | About 600 to 1,200 lumens | Ceiling opening, junction box, and wiring | Installation usually requires line-voltage work and an electrician |
Tools and Materials You Need
A screw-in bulb or E26-adapter retrofit requires beginner-level skills. Awkward access or damaged trim can make the work harder. Stop if you find brittle insulation, scorched wiring, loose splices, an unsupported junction box, or wiring that requires disconnection.
Buy the new light before removing multiple old fixtures. Test one location first because similar-looking cans can have different depths or spring brackets.
Use one color temperature throughout the room to avoid a patchy appearance. A 2700K LED resembles warm incandescent light, while 3000K produces a cleaner warm white. A 4000K LED provides neutral white light for utility and task areas.
For living spaces, choose a color rendering index of at least 90 CRI. Higher color rendering helps skin tones, wood, fabric, and food look more natural.
- UL- or ETL-listed LED bulb or recessed retrofit module
- Correct E26 adapter or manufacturer-compatible connector, if required
- Stepladder rated for the user and working height
- Non-contact voltage tester
- Tape measure
- Work gloves and safety glasses
- Flashlight or headlamp
- LED-rated dimmer, if the existing dimmer is incompatible
- Replacement torsion-spring brackets only when the housing manufacturer approves them
Steps for Changing Recessed Lighting to LED
- Confirm that the existing light works. Turn it on before shutting off the circuit. The old lamp should illuminate normally, making the later power-off check meaningful.
- Turn off power at the breaker. Switch off the correct circuit breaker and confirm that the light no longer operates. Test your voltage tester on a known live source before and after checking the fixture.
- Remove the old lamp and trim. Let the lamp cool before unscrewing it. Pull the trim down gently without tugging wires or bending the housing.
- Inspect the recessed housing. Read its label and check for corrosion, heat damage, loose sockets, housing size, and IC markings. Stop if you see charred parts, exposed conductors, or insulation against a non-IC housing.
- Set the LED module’s color temperature. Move the selectable-CCT switch before installation. Give every module in the room the same Kelvin setting.
- Install the socket adapter. Screw the E26 adapter into the existing socket until snug. Do not overtighten it. The adapter should sit straight without wobbling.
- Connect the LED module. Push the module’s plug into the adapter connector until fully seated. A gentle pull should not separate the connection.
- Engage the mounting springs. Compress the torsion springs or friction clips and insert them into the approved housing brackets. Both sides should hold tension and keep the module level.
- Seat the downlight against the ceiling. Push the module upward evenly. Keep the connector and wires clear of the trim. The finished trim should sit flush without visible gaps.
- Restore power and test the light. Turn on the breaker, then operate the wall switch. Look for steady light without buzzing, pulsing, delayed restarts, or repeated shutoffs.
Stop if the socket turns, a wire pulls loose, or installation requires cutting off a connector. Never improvise a splice inside the can. Do not use wire connectors unless the fixture instructions specifically allow them.
A licensed electrician should handle junction-box access and line-voltage wiring changes. This includes defective sockets, damaged conductors, and hardwired housing replacement.
Choose Brightness, Beam Angle, and Color Temperature
Match the LED to the room by lumens, not the wattage printed on the old lamp. Wattage measures electricity use, while lumens measure visible light output. Better optics and efficiency can make a low-wattage LED brighter than a higher-wattage model.
For general residential downlighting, 700 to 900 lumens per fixture provides a useful starting range. High ceilings, dark finishes, and wide fixture spacing may require 1,000 lumens or more. Excessive output creates glare rather than useful illumination.
A selectable-lumen retrofit helps when the existing layout makes the required output difficult to predict. Test the lowest suitable setting first, especially in rooms with several fixtures.
Beam angle also affects the room’s appearance. A narrow beam concentrates light on a counter, fireplace, or artwork. A wide flood spreads light more evenly across walls and floors.
Standard retrofit downlights usually provide broad general illumination. They cannot replace an adjustable accent light when you need precise aiming.
| Specification | Practical target | What happens if it is wrong |
|---|---|---|
| Light output | About 700 to 1,200 lumens for many residential cans | Too little looks dim, while too much creates glare |
| Color temperature | 2700K to 3000K for warm living areas; 3500K to 4000K for neutral task areas | Mismatched fixtures make the ceiling look uneven |
| Color rendering | 90 CRI or higher where appearance matters | Lower CRI can make finishes and skin tones look dull |
| Beam | Wide flood for general lighting | A narrow beam creates bright spots and dark gaps |
| Dimming | Dimmable LED paired with a compatible LED-rated dimmer | An incompatible combination can flicker, buzz, or remain faintly lit |
Dim Recessed LED Lights Without Flicker
Use an LED-rated dimmer with recessed LED lights. Old incandescent dimmers often cause flicker, buzzing, limited dimming, and faint illumination after shutoff. Both the LED and the dimmer must carry a dimmable rating.
Matching labels do not guarantee compatibility. Check the light manufacturer’s dimmer compatibility list when available, especially when one control operates several fixtures. Keep the connected wattage within the dimmer’s LED load rating.
Test the control through its full range after installation. The lights should start consistently, remain stable, and avoid audible noise at high and low settings. Some LED dimmers include a low-end adjustment that prevents unstable operation.
Replacing a wall dimmer requires line-voltage work inside an electrical box. Hire a licensed electrician unless you have the required skills and local rules allow the work. Neutral-wire requirements and multi-location switching can complicate an otherwise simple replacement.
Check Ratings for Bathrooms, Showers, and Insulated Ceilings
Moisture ratings matter because standard recessed LEDs cannot handle every location. A typical bathroom ceiling usually requires a damp-location-rated fixture. A light directly above a tub or shower may require a wet-location listing under local code.
Some products also provide an IP rating. IP44 indicates resistance to splashing, while IP65 provides stronger protection against water jets. Neither rating allows submersion.
Follow the product listing and installation instructions rather than relying only on a general IP description. A damp-rated trim does not automatically qualify for shower use. A gasket alone does not establish a wet-location listing.
Insulation requires a separate check. An IC-rated housing can contact approved insulation, while a non-IC housing requires clearance. A cooler LED does not convert a non-IC can into an IC-rated fixture.
Do not pack insulation around an older non-IC housing simply because the LED uses less power. Also check the ceiling for fire-resistance and air-sealing requirements. New trim may reduce drafts, but it does not automatically restore a rated ceiling assembly.
Hire an electrician if the housing needs replacement for insulation, fire, or air-leakage compliance. Use an assembly listed for the specific application.
Troubleshoot Problems After the Retrofit
Most retrofit problems involve heat, loose connections, incompatible dimmers, or poor housing fit. Stop using any light that smells hot, shows discoloration, or repeatedly trips the breaker. Use the table below to match each symptom with its likely cause and next step.
| Problem | Likely cause | Fix |
|---|---|---|
| LED flickers at low brightness | Old incandescent dimmer or incompatible LED dimmer | Install a compatible LED-rated dimmer and adjust its low-end setting |
| Light buzzes | Dimmer incompatibility, loose module, or noisy driver | Test at full output, reseat the module, and check dimmer compatibility; replace the LED if buzzing continues |
| Light switches off after several minutes | The driver overheats in an enclosed or poorly ventilated housing | Use an enclosed-fixture-rated bulb or a retrofit listed for that housing |
| Trim will not sit flush | Trapped wires or springs that do not match the can | Turn off power, reposition the connector, and use the correct mounting method |
| One fixture has a different color | Different selectable-CCT settings or product specifications | Turn off power and set every module to the same Kelvin value |
| New LED does not turn on | Loose adapter, disconnected plug, failed socket, or tripped breaker | Turn off the circuit and reseat accessible plug-in parts; call an electrician for socket or wiring defects |
| Breaker trips | Damaged wiring, a short circuit, or an unsuitable connection | Leave the breaker off and have a licensed electrician inspect the circuit |
Calculate LED Energy Savings
Energy savings depend on the old and new wattages, daily operating time, and electricity rate. Consider six recessed lights with 65-watt incandescent reflector bulbs. Replacing them with comparable 10-watt LEDs reduces the connected load from 390 watts to 60 watts.
The difference equals 330 watts, or 0.33 kilowatts. At four hours of daily use, the lights save 481.8 kilowatt-hours per year. The calculation is 0.33 kW × 4 hours × 365 days.
At $0.15 per kilowatt-hour, the annual energy-cost reduction would equal about $72.27. Adjust the electricity rate and operating hours to match your home. The example does not guarantee a specific result.
Read LED lifespan claims carefully. An L70 rating estimates when average light output will decline to 70% of its initial level under test conditions. It does not guarantee how long every lamp will operate.
Excessive heat inside a recessed housing can shorten both driver and LED life. Savings also rise with operating time. A kitchen or hallway used every evening offers a faster payback than a seldom-used guest room.
Local utility rebates may reduce the initial cost. However, eligibility depends on the program and the specific listed product.
Test One Fixture Before Completing the Room
Install one LED before converting every recessed fixture. Check its fit, brightness, color temperature, beam spread, dimming performance, and ceiling appearance. Evaluate it after dark, when differences become easier to see.
A module that looks acceptable on a workbench may create uncomfortable glare when mounted overhead. If the test fixture performs well, convert the remaining cans with the same settings and installation method.
Keep the product instructions and record the selected Kelvin setting. This information will help you match a future replacement. Avoid mixing trims, diffuser textures, lumen outputs, or color temperatures within the same ceiling.
Changing recessed lighting to LED should produce secure trims, steady output, and no exposed wiring or heat-related cycling. Screw-in and adapter-based retrofits suit many DIY projects. Damaged sockets, junction-box work, and hardwired housing replacement require a licensed electrician.
Choose the replacement by lumens, housing compatibility, location rating, and dimmer compatibility. These specifications matter more than wattage alone.