Can you cut LED lights without damaging them? Yes, if the manufacturer designed the product for cutting and you use a marked cut line. This guide covers low-voltage LED strip lights used under cabinets, behind televisions, on shelves, and in residential coves. Always disconnect the power before inspecting, cutting, or reconnecting any lighting product.
A cut through an LED, resistor, controller chip, or copper trace can disable part or all of the strip. Flexible LED tape usually has printed cut marks between complete electrical segments. Rope lights, rigid light bars, and mains-voltage tape may not allow field cutting.
Match the strip voltage, width, and conductor count when choosing connectors or replacement wire. Stop and hire a licensed electrician if the project involves permanent line-voltage wiring, a junction box, or a new circuit.
Can You Cut LED Lights at Any Point?
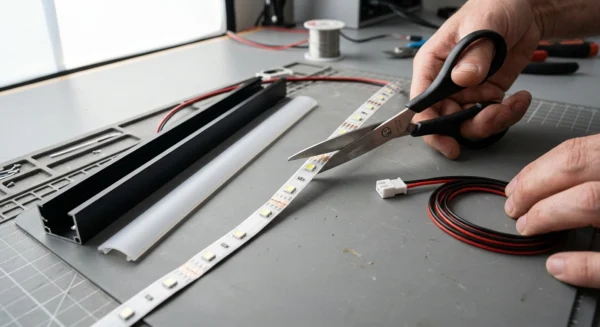
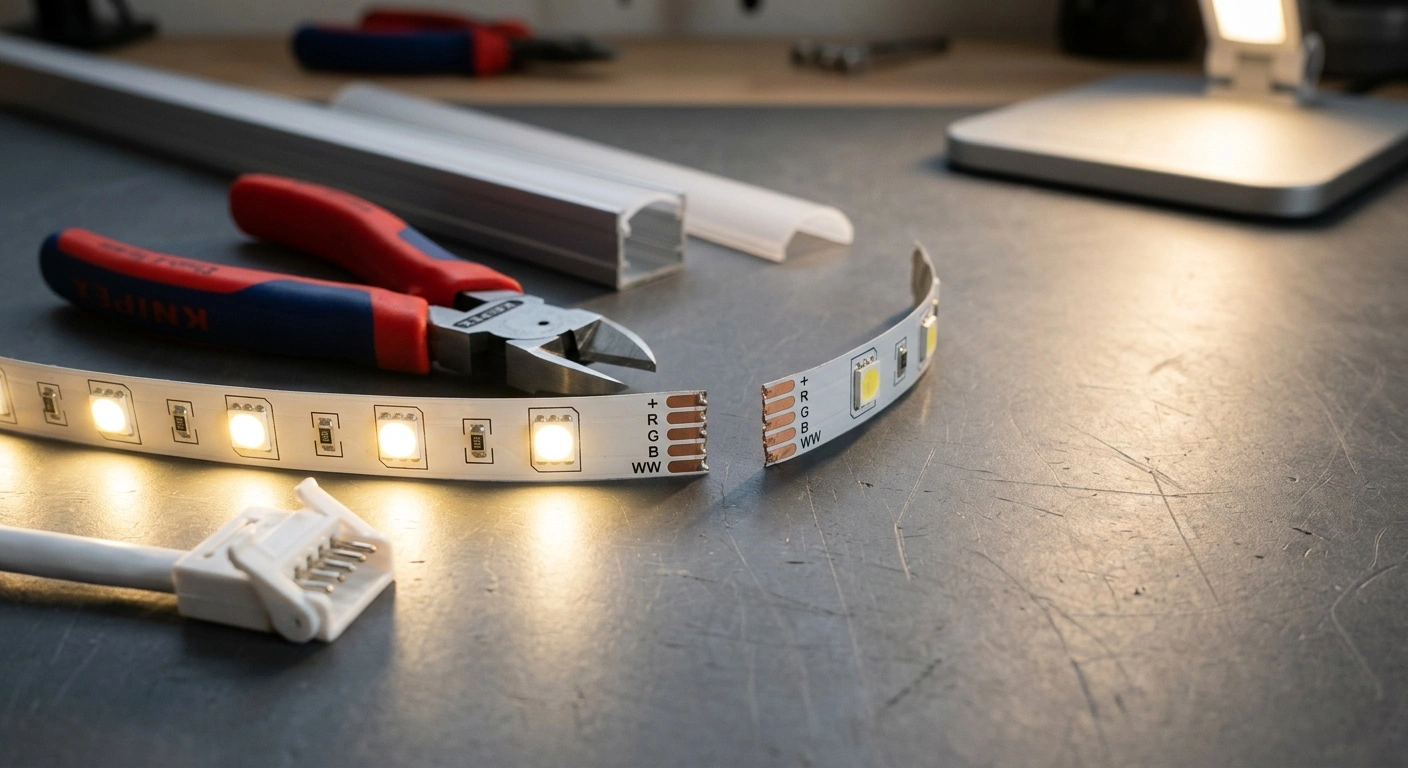
You cannot cut an LED strip at any convenient length and expect it to work. Look for a scissors symbol, a printed line, or copper pads that cross the strip. These marks separate complete electrical segments. The LEDs and resistors on each side can then retain a working circuit.
Cut-point spacing varies by strip design. Some strips allow cuts every few inches, while others require longer sections. Follow the printed marks and manufacturer instructions rather than cutting to an exact decorative measurement.
Single-color strips usually have two copper contacts marked positive and negative. RGB, RGBW, tunable-white, and addressable strips use more conductors. Any connector must match both the contact count and the strip width.
A two-pin connector cannot operate a four-conductor RGB strip, even when both products use the same voltage. Addressable strips also carry data in one direction. Printed arrows usually show the correct signal direction.
You can cut COB LED tape only at the manufacturer’s marked points. Its continuous phosphor surface does not make every location safe. Waterproof strips may hide their copper pads beneath clear silicone, which makes the marks harder to see. Do not cut a product without a visible mark or documented cutting instructions.
Identify Your LED Light Type
Most residential LED tape uses a low-voltage driver or plug-in power supply. Common operating voltages include 5, 12, and 24 volts DC. These voltages are not interchangeable.
A 24-volt supply can destroy a 12-volt strip. A supply with the wrong voltage may also produce weak light or no light. Read the labels on the strip, controller, and power supply before separating any parts. Do not rely on plug shape because similar connectors can carry different voltages.
Plug-in, low-voltage tape usually offers the simplest cutting and reconnecting process. Mains-voltage rope lights and line-voltage tape require specified cut intervals, connectors, rectifiers, end caps, and sealing methods. An incorrect cut can expose hazardous voltage.
Treat any product that connects directly to household power as line-voltage equipment. This rule applies even when the product resembles ordinary flexible tape.
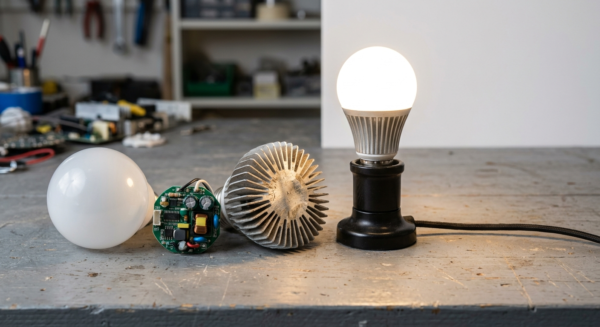
Rigid under-cabinet bars belong to a different product category. Some models link together, but their aluminum housings and circuit boards do not support cutting. You should also leave light strings intact unless the manufacturer provides shortening instructions.
If you cannot identify the light type or input voltage, do not experiment. Replace it with a documented, safety-listed strip-light system.
Tools and Parts You Need
Skill level: Beginner to intermediate for plug-in, low-voltage LED tape. You should know how to measure accurately, identify polarity, and make small electrical connections. This procedure does not cover permanent line-voltage work.
Tools
- Fine-tip scissors or sharp flush cutters
- Tape measure or steel rule
- Fine-tip permanent marker
- Plastic opening tool or utility knife for removing silicone coating
- Wire stripper for wired connectors
- Multimeter that measures DC voltage and continuity
- Clean cloth and isopropyl alcohol
- Soldering iron, electronics solder, and heat-resistant mat if you plan to solder
Parts
- Low-voltage LED strip with clearly marked cut points
- Compatible driver or plug-in power supply with the correct output voltage
- Solderless connector that matches the strip width and conductor count
- Suitable low-voltage wire for soldered joints
- Compatible controller for RGB, RGBW, tunable-white, or addressable tape
- Heat-shrink tubing or manufacturer-approved insulating caps
- Approved silicone sealant and replacement end caps for moisture-resistant installations
- Aluminum LED channel and diffuser when the strip needs heat control or a finished appearance
- UL- or ETL-listed components rated for the installation location
Use dry-location products only in protected indoor spaces. Choose damp-location products where condensation or occasional moisture may occur. Near sinks and other splash areas, use a suitably listed system and follow local placement requirements.
For exposed outdoor use, the complete assembly must carry a wet-location rating. An IP65 enclosure generally resists rain and water jets, but it does not support submersion. Cutting a coated strip breaks its original moisture seal. Restore that seal with the manufacturer’s specified cap and sealant.
How to Cut LED Strip Lights
- Disconnect the strip from power. Unplug the power supply and confirm that every LED turns off. Never cut or handle exposed contacts while the strip has power.
- Confirm the voltage and conductor layout. Match the voltage printed on the tape to the driver output. Count and identify every copper contact.
- Measure from the power-entry end. Find the nearest usable cut mark at your planned endpoint. Do not stretch the tape or force it around a corner.
- Mark the factory cut line. Confirm that it passes between complete LED segments. On many strips, the line crosses the center of exposed copper pads.
- Cut straight across the tape. Use sharp scissors and keep the edge square. Leave enough copper pad on both sides for future connections.
- Expose coated contacts if necessary. Carefully remove silicone from the pad area. Avoid cutting into the flexible circuit board or copper traces.
- Attach the connector or solder the wires. Align positive with positive. Match every color, white, clock, ground, and data terminal as applicable.
- Insulate and support the joint. Prevent bare conductors from touching neighboring pads. Add strain relief so cable movement cannot pull on the connection.
- Run a short bench test. Reconnect the low-voltage supply and test every color channel. Watch for flicker, dead sections, uneven light, or unusual heat.
- Disconnect power and mount the strip. Clean the surface with isopropyl alcohol first. Keep the tape flat and avoid sharp bends or crushed components.
- Seal the cut end when moisture protection matters. Cover every conductor with the approved cap and sealant. Follow the product’s damp- or wet-location instructions.
- Complete the final test. Restore power and operate the strip at full output. Test all controller functions before installing a diffuser or hiding the wiring.
Make a Clean, Reliable Connection
Solderless clip connectors save time, but they must fit the tape closely. Measure the strip width and count its conductors before buying a connector. Product photographs alone do not provide enough information.
Open the connector latch and slide the tape beneath the contact blades. Align the polarity marks, seat the strip fully, and close the latch. If the lights work only when you squeeze the connector, the contacts have not seated correctly.
Soldering creates a lower-profile joint and often fits better inside narrow channels. Use a temperature-controlled iron and work quickly. Prolonged heat can soften the strip substrate or lift a copper pad.
Tin the wire and copper pad before joining them. Then inspect the connection for solder bridges between adjacent contacts. Protect the finished joint with heat-shrink tubing or another suitable insulator.
Do not fold LED tape sharply around corners. A tight crease can fracture copper traces while leaving the outer coating intact. Use a corner connector, jumper wires, or separate joined sections instead.
Keep ordinary LED tape away from stoves, radiators, and other hot surfaces. Excess heat shortens LED life and weakens mounting adhesive.
Size the Power Supply Correctly
Shortening a strip reduces its electrical load. However, reconnecting the offcut elsewhere adds that load back to the system. Calculate total wattage before selecting a power supply.
Use the manufacturer’s watts-per-foot or watts-per-meter rating. For example, an eight-foot strip rated at 4 watts per foot uses 32 watts. The driver must provide the exact strip voltage and enough wattage for the full connected length.
Choose a driver with some unused capacity instead of running it continuously at its stated limit. Follow the manufacturer’s sizing guidance, especially for high-output tape and enclosed installations.
Manage Voltage Drop
Long low-voltage runs can lose brightness toward the far end. Narrow copper traces create resistance as current travels along the strip. RGB tape may also show a color shift when voltage falls.
A feed at both ends can improve uniformity when the manufacturer permits that method. You can also divide a long installation into shorter parallel runs. Use properly sized wire and follow the controller’s current limits.
Do not connect the far end to a separate, unidentified power supply. Mismatched supplies can interact unpredictably and damage components.
Control Heat
Higher-power tape may need aluminum channel to transfer heat away from its circuit board. A diffuser softens visible LED points, but it does not remove heat. Avoid enclosing powerful tape in an unventilated cavity unless the system supports that use.
Heat accelerates light-output loss, adhesive failure, and color shift. Published service-life figures usually reflect controlled test conditions. They do not guarantee the same lifespan inside a hot cabinet or sealed recess.
Dimming a Cut LED Strip
Cutting a dimmable strip usually preserves its dimming function. The remaining section still needs the correct controller and driver. Basic single-color tape often uses a compatible PWM controller between the power supply and strip.
RGB and tunable-white products need controllers that operate each separate channel. Addressable tape also requires a compatible data controller and the correct voltage.
If a wall dimmer controls the driver’s AC input, the dimmer and driver must support each other. An old incandescent dimmer can cause flicker, buzzing, weak low-end control, or incomplete shutoff. Never assume a plug-in power supply accepts wall-dimmer control. Check its label and documentation.
Hire a licensed electrician to install a wall dimmer or change permanent wiring. The same rule applies when placing a driver inside a junction box. A low-voltage strip does not remove the hazards on the driver’s mains side.
Reuse the Leftover LED Strip
A clean offcut can become a separate light or reconnect to the original run. It must end at a proper cut line and retain undamaged copper pads. The offcut still needs a driver with the correct voltage.
Multicolor tape also needs the appropriate controller. Follow polarity and data direction exactly as you did with the first section.
Do not join strips indefinitely because the connectors happen to fit. Controllers, connectors, wires, and power supplies all have current limits. Long tape runs also develop noticeable voltage drop.
Check the manufacturer’s maximum continuous run and power-injection instructions. Keep cabinet connectors accessible enough for future inspection and repair.
Store unused tape flat or loosely wound on its original reel. Tight bends can crack its copper traces. Cover exposed pads so they cannot touch metal tools or shelving. Label the saved section with its voltage and strip type.
When You Should Not Cut LED Lights
Do not cut a strip without marked cut points, an identifiable voltage, or documented field-cutting instructions. Visible groups of LEDs inside a molded rope light do not indicate safe cutting locations.
Rope-light systems may use cut intervals much longer than their LED spacing. They can also require special power pins, rectifiers, seals, and end caps. Remove damaged mains-voltage rope light from service instead of patching it with household tape.
Leave hardwired under-cabinet fixtures and junction-box connections to a licensed electrician. Get professional help when wiring must pass through walls or cabinetry under building-code requirements.
Do not bury flexible LED tape or ordinary plug-in cords inside a wall. Only use a concealed wiring method that carries approval for that purpose. Local rules may also govern low-voltage cable types, penetrations, and concealed splices.
Replace tape that looks scorched, brittle, corroded, or separated from its coating. Use UL- or ETL-listed parts with the correct dry-, damp-, or wet-location rating. A silicone jacket alone does not prove that a modified assembly remains suitable for outdoor use.
Troubleshooting a Cut LED Strip
- The entire strip stays dark: Confirm that the supply has power and provides the correct voltage. Disconnect it before checking polarity or reseating the connector.
- Only the section before the joint works: Inspect the downstream connector for damaged or misaligned contacts. If enough tape remains, cut again at the next approved line.
- One RGB color does not work: A color channel may lack contact or connect to the wrong terminal. Check for bent contacts, broken traces, and solder bridges.
- An addressable strip stops at the new joint: Follow the printed signal arrows. Match voltage, ground, data, and clock pads where applicable.
- The strip flickers when touched: A clip connector may sit loosely, or a solder joint may have cracked. Remake the joint and add strain relief.
- The far end looks dim or changes color: Check for excessive run length, undersized wire, or an overloaded supply. Use a manufacturer-approved parallel feed or power-injection layout.
- The strip buzzes or flickers while dimming: Confirm compatibility between the dimmer and driver. Ask an electrician to handle any line-voltage changes.
- The adhesive releases: Disconnect power and clean the mounting surface. Use aluminum channel or approved mounting clips on textured, oily, or warm surfaces.
A Safe Cut Starts at the Marked Line
The answer to “can you cut LED lights?” depends on the product and its marked cut points. Documented low-voltage LED tape usually supports cutting. Products without designated lines or manufacturer instructions should remain intact.
Confirm the voltage, strip width, conductor count, polarity, and controller type before ordering parts. Cut through the center of the correct mark, then test the section before mounting it.
Use listed components that suit the installation’s moisture level. Restore the moisture seal after cutting coated tape, and use aluminum channel when the strip needs better heat control. Hire a licensed electrician whenever the project reaches mains voltage, permanent household wiring, or a junction box.